Thinking about giving your concrete floors a transformative, designer-style finish? Staining concrete is one of the easiest and most affordable DIY methods to enhance the look of an otherwise dull slab. Whether you're redecorating your home, flipping a property, or looking to add personality to a commercial space, staining concrete can dramatically elevate your flooring aesthetics. This guide will walk you through the simple steps to achieve a beautiful, lasting result.
Concrete staining works well in modern flats, converted lofts, garden rooms, garages, basements, and even commercial interiors. It’s durable, minimal maintenance, and allows for creative flexibility with colour and finish. Here’s everything you need to know to stain concrete floors like a pro—all without calling in professionals.
What Is Concrete Staining?
Concrete staining is the process of applying a translucent colour that chemically reacts or physically adheres to the surface of concrete. Unlike paints or coatings, stains penetrate the concrete, giving it a rich, variegated, and natural look that doesn’t peel or chip. Once sealed, the result is long-lasting and easy to maintain.
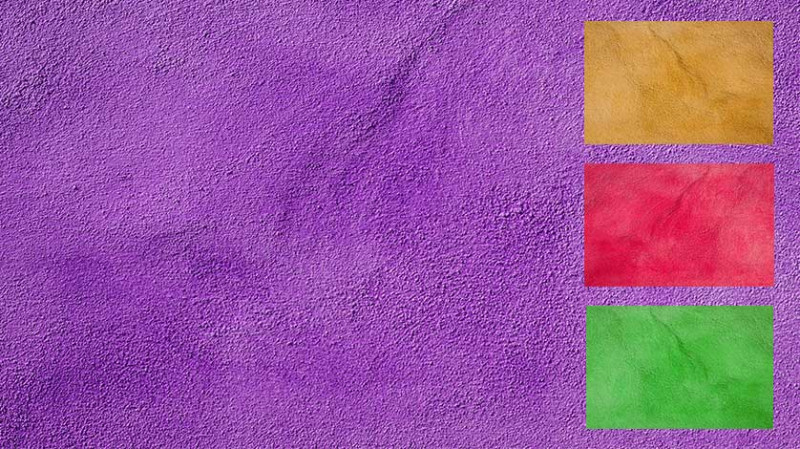
There are two main types of concrete stains: acid-based and water-based. Acid stains react chemically with the concrete to produce earthy tones like browns, greens, and terra cottas. Water-based stains, on the other hand, offer a wider colour palette (including bright and bold colours) and are easier to apply with less hazardous fumes—a popular choice for indoor projects in UK homes.
Concrete staining is widely used in both residential and commercial environments, favoured by interior designers and architects for its versatility. It works with different design styles—from industrial minimalism to rustic farmhouse or even a luxe contemporary look, depending on the colour and finish you choose.
Homeowners particularly love it for basement renovations, kitchen floors, sunrooms, or even conservatories. It adds a tactile warmth and visual depth while being more stylish than painted concrete.
Tools and Materials You'll Need
Before getting started, make sure to have the necessary tools and materials ready. Staining concrete is a straightforward process, but good preparation is crucial for a flawless finish.
| Item | Purpose |
|---|---|
| Concrete Cleaner / Degreaser | To clean and prepare surface |
| Protective Gloves & Safety Goggles | Personal safety |
| Painter's Tape & Plastic Sheets | Masking off adjacent areas |
| Concrete Stain (Acid or Water-Based) | The colouring agent |
| Plastic Pump Sprayer or Sponge | To apply stain evenly |
| Scrub Brush or Broom | To work stain into surface |
| Neutraliser (for acid stains) | Stops chemical reaction post staining |
| Concrete Sealer (Matt, Satin or Gloss) | Protects and enhances finish |
These supplies are widely available in local UK builders merchants, DIY stores like B&Q, Wickes and online suppliers. Be sure to check whether you're using indoor-approved products if staining interior floors.
Step-by-Step Guide to Staining Your Concrete Floor
Step 1: Prepare the Surface
Start by inspecting your concrete floor. Ensure it’s structurally sound, free of deep cracks or flaking areas. If old sealers, paints or adhesives are present, these must be removed using a concrete stripper or grinder. New concrete should be fully cured—it usually takes at least 28 days.
Clean the surface thoroughly using a concrete degreaser. Sweep away dust or debris and eliminate grease, oil, or stains. Use a stiff bristle brush for heavily soiled areas. The cleaner the surface, the better the stain will penetrate and adhere.
If working indoors, tape off walls, skirting boards and protected areas with painter’s tape and plastic sheeting. Cover nearby furniture or appliances to avoid accidental splatter. Good ventilation is essential, especially when using acid-based products.
Step 2: Test and Pick Your Colour
It’s highly recommended to do a small test patch in an inconspicuous corner. Concrete is a natural material, and its porosity and mineral composition vary. This affects how each stain colour will develop.
Let your test area dry completely and evaluate the intensity and coverage. Remember: stains are translucent, not opaque—so the base surface tone will impact the final look. If you'd like a more vibrant result, water-based stains typically offer brighter, more uniform colours.
Step 3: Apply the Concrete Stain
Once you're happy with the stain choice, it’s time to apply. Use a plastic spray pump or sponge mop to spread the stain evenly across the floor. Work in sections, overlapping your strokes slightly to avoid lap marks. Do not allow puddling—this leads to blotchy results.
Let the stain react and set. For acid stains, this may take up to 24 hours. Water-based stains generally require less time. Avoid walking over the surface while it stains, as foot traffic can disturb the finish.
If a deeper tone is desired, additional coats can be applied once the first layer is dry. Allow each coat to fully cure before proceeding to the next stage.
Step 4: Neutralise and Clean (For Acid Stains)
If you’ve used an acid-based stain, you'll need to neutralise the surface after the desired colour is achieved. Mix a solution of baking soda and water, or use a ready-made neutralising solution as specified by the stain manufacturer.
Apply the neutraliser liberally using a mop or sprayer. Scrub the surface gently with a soft broom or pad to ensure even neutralisation, then rinse thoroughly with clean water. Repeat the rinsing until all residue is removed and the floor is no longer slippery.
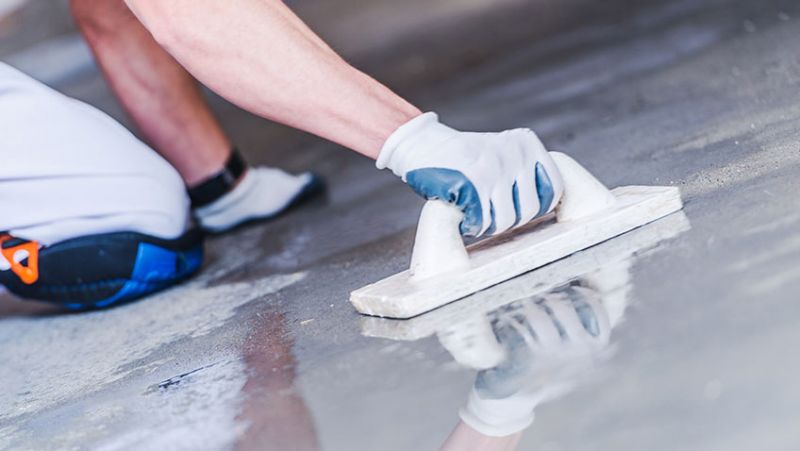
Step 5: Seal the Floor
Once the stained floor is clean and completely dry—it may take 24-48 hours—it’s time to seal. The sealer protects your new concrete finish from stains, spills, foot traffic, and UV light. It also enhances the depth of colour and sheen.
Choose your finish: matt for a natural raw concrete look, satin for a soft sheen, or gloss for a polished effect. Use a roller or sprayer to apply the sealer in thin, even layers. Avoid thick coats that can create peeling over time.
Most sealers dry within a few hours, but it’s best to keep traffic off the surface for at least 24 hours. The full cure time could be up to 3-5 days, depending on brand and conditions.
Maintenance Tips for Long-Lasting Results
One of the main benefits of stained concrete floors is ease of maintenance. Regular sweeping and occasional mopping with a pH-neutral cleaner keep them looking fresh. Avoid harsh chemicals or acidic cleaners which may damage the sealer.
For high-traffic areas or commercial applications, consider applying a wax topcoat over the sealer to extend its life and provide extra protection. These waxes can be reapplied every few months depending on wear.
If the floor starts to lose its sheen after a few years, simply reapplying a coat of sealer can restore its original beauty. No need for sanding or stripping—a true benefit for DIYers and busy professionals.
Common Mistakes to Avoid
- Skipping surface prep: Dirt, oil, and previous coatings can prevent the stain from adhering and cause blotchy spots.
- Not testing the stain first: Concrete reacts differently, and the final colour can surprise you if untested.
- Over-applying sealer: Too much can cause cloudy, slippery surfaces or peeling down the road.
- Using the wrong tools: Metal sprayers and brushes can react with acid stains. Stick to plastic tools wherever possible.
- Ineffective ventilation: Especially with acid stains or sealers, ensure your space is well-ventilated during application.
Conclusion
Staining your concrete floor is a smart, cost-effective way to breathe new life into a bland surface. Whether you’re refurbishing a trendy flat in East London or building a designer annexe in Edinburgh, this DIY project is accessible to both beginners and seasoned renovators.
It’s not just about aesthetic value—stained concrete increases flooring durability, simplifies cleaning, and adds resale flair. With the right preparation and quality materials, you can achieve a high-end look without the high-end cost.
Ready to transform your concrete with colour? Follow this DIY guide and step into a stunning new space your friends and clients will admire for years to come.
Trending articles
-
How To Stain Concrete Floors | Easy ...
14 Apr, 2025
-
 How to Level Concrete Floor ...
27 Jun, 2022
How to Level Concrete Floor ...
27 Jun, 2022
-
 Tips to Grow Your Construction ...
23 Jun, 2022
Tips to Grow Your Construction ...
23 Jun, 2022
-
 How to Choose the Right Builder for ...
11 Jan, 2022
How to Choose the Right Builder for ...
11 Jan, 2022
-
 How to Buy Building Materials on a ...
28 Aug, 2020
How to Buy Building Materials on a ...
28 Aug, 2020
